
C64 Mini/MAXI STICKS
Insert the stick into the spare USB port and turn C64 on. The first time you use a stick you will need to update the firmware. Instructions at the bottom.
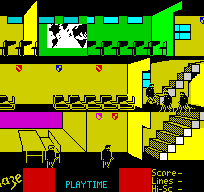
A memory stick will now be at the bottom of the menu page. Select this and the game folders will open on screen. They are stored alphabetically. When you open a game, often the first screen to open will be the "crack" screen. Usually the way past this is to open the Virtual Keyboard and press space or run/stop.
With the Mini/Maxi there are two types of joystick configuration which differs depending on the game. To change the joystick port hold down the menu button on the joystick and press A or B.
For multiple disk games you need to enter Classic Mode in Settings. You will then be able to swap disks during the game.
Watch the video below for more info on how to do any of the above:
https://youtu.be/Arax4gTb8xo
Firmware Update
Select menu Device settings > System information
The update file will be detected and you will be given the choice to Apply the update or Close the screen
If you choose not to update at this time, select Close. If you Apply the update, a screen will appear showing the update process:
Upgrade progress image
Do not interrupt or remove power while the update is in progress. After a successful update the console will restart automatically.
Intellivision Sprint
Insert the stick into the port on the back of the console. Then turn the console on. The firmware will update automatically to be able to play the games on the stick.
NEVER PLUG THE STICK IN OR TAKE IT OUT WITH THE POWER ON. IT WILL DAMAGE THE FIRMWARE AND STOP YOUR CONSOLE FROM WORKING.
The400 (Atari)
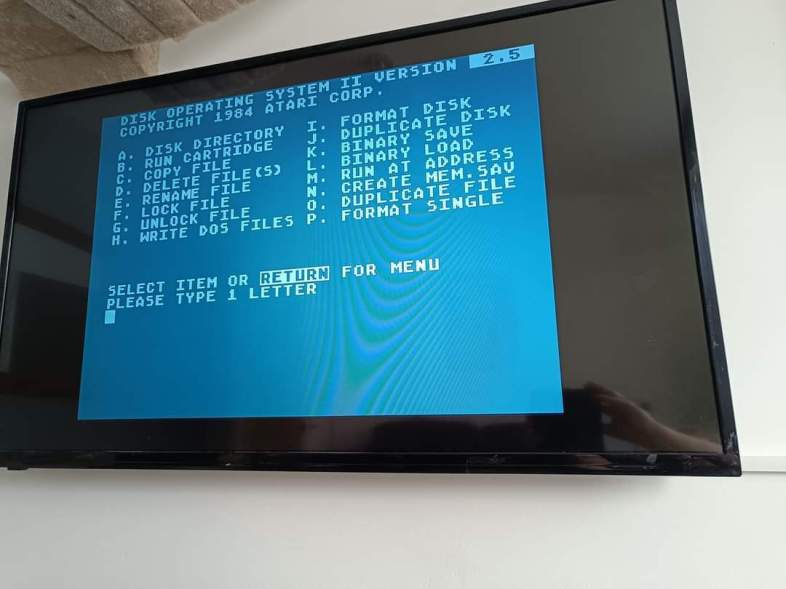
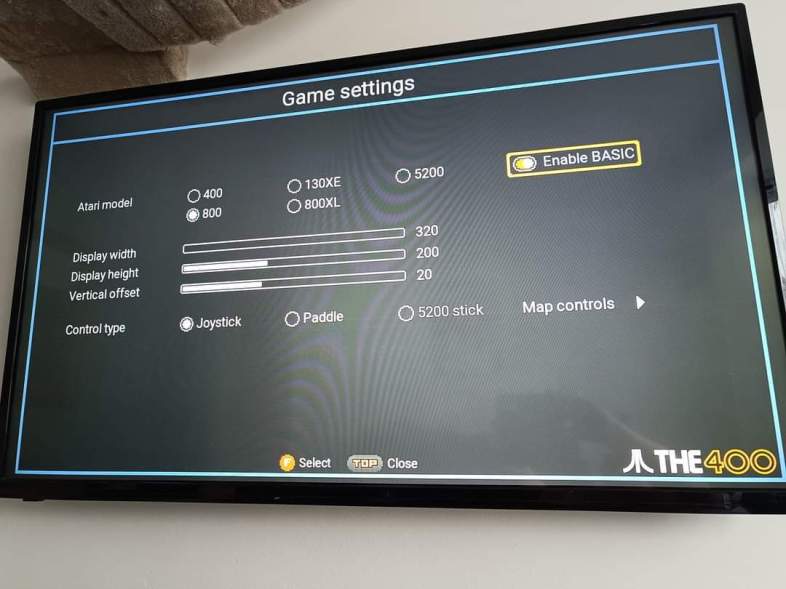
So, the all important instructions for THE400 stick! Put the stick in the back USB. Select the USB on the carousel. The files are alphabetical as per previous sticks. When you open a game you will get used to seeing the below screen....if you do, or if the game doesn't open in a different way then open the game options to get the second screen below. Generally you will need to "enable basic", however you will also find starting at 800XL, then 800, then 400 will give you the best version. Once you have the settings for that game to work, it will hold them for next time. If only they had set "enable basic" as default!!!! Multi-disc only seems to work for up to 3 discs at present but I have left any with more on there as hopefully they will change it on future updates. There aren't too many of these though.
The spectrum STICKS
Plug the USB in the slot nearest to the HDMI and the controller in the one furthest away. Turn on the console. The first time you use the stick you will need to update the firmware. Instructions at the bottom.
The usb icon should be under the letter M of the carousel (genius idea!)
Use A to select folders. There are both TAP files which are instant load as well as TZX which give the full loading experience. Select a file with A but THEN ALWAYS PRESS MENU. This will allow joystick use in the game. A normal gamepad like the one for the A500 Mini will work as Kempston. Go back out of this menu and press HOME to play the game.
Sometimes the cursor will come up. Just press RUN on the keyboard.
Firmware Update
Insert the USB stick into the rear USB port of The Spectrum next to the HDMI output.
Go to Options → Advanced options → System information.
The Spectrum will check if there is a newer firmware on the USB stick and, if so, give you the options to Update or Cancel.
Selecting Update will begin the installation process. The Spectrum will display a progress bar which will fill up from left to right as the update proceeds.
Do not interrupt or remove power while the update is in progress. After a successful update The Spectrum will restart automatically.
A500 Mini usb sticKS (INC FULL MONTY & THE WORKS)
Turn on the A500 Mini.
When the menu is on screen insert the stick.
The first time you use a USB in the A500 Mini you will need to update the firmware. Instructions at the bottom.
Select stick which should be on the carousel.
The games are in the alphabetical folders. Select the one you want to play using the A button.
Then press MENU. You now need to go into the Mapping Joystick menu and leave. If you don't do this step the virtual keyboard won't work in the game. When back in the list of games press HOME and the game will start.
Updating Firmware:
Go to Options → Advanced options → System information.
THEA500 Mini will check if there is a newer firmware on the USB stick and, if so, give you the options to Update or Cancel.
Selecting Update will begin the installation process. THEA500 Mini will display a progress bar which will fill up from left to right as the update proceeds.
Do not interrupt or remove power while the update is in progress. After a successful update THEA500 Mini will restart automatically.
A500 console pack
A500 Coin-op Pack
A500 PS1 Pack
A500 N64 & Dreamcast Pack
Put the stick in as normal. The first time you use a USB in the A500 Mini you will need to update the Firmware. See the instructions above.
Select the USB from the carousel. Select the Pandory folder and press A. Select the Pandory file and press A. NEVER PRESS THE MENU BUTTON ON THIS PAGE. IF YOU DO, YOU WILL NEED TO FOLLOW THE INSTRUCTIONS AT THE BOTTOM.
Press the HOME button. This takes you to the main menu.
Use the direction buttons to scroll right to the console you want and then down to the game you want. Press A to start the game.
To exit a game back to menu hold down MENU and HOME together.
If The Stick Stops Working
Put the stick in a PC or laptop. Ignore any error messages as you don't want to "fix" the stick as that will mess with the formatting.
Copy the contents of the Emergency Folder into the Pandory folder. (Make sure you don't Move it in case you ever need it again.). It will ask if you want to overwrite the existing file(s) which you say yes. And that's it! Stick is fine again. with that stick is to NEVER press the Menu button on your pad when you are in the A500 menu system. That is what overwrites the file and makes it fail.
Message me if you have any problems with this.